Tuesday, December 2, 2014

What to do when you need soap boxes and your out or can't find them?


I'm doing a craft fair this weekend, and I don't deal with bath type soaps as often as I would like.  So I either can't find them or I am out of the rectangle type boxes.   A few years ago when we put down new flooring in the house, just about all my craft supplies were sent down to the basement until the job was done.  I was ill in bed and couldn't help my husband, to which I think he was happy with because I couldn't tell him how to do his job.  A job he has done before and knows how to do..... Least to say he didn't put all my things in the same spot, and among all the other boxes of outgrown toys, the kids old clothes and plain things we don't need anymore or don't know what else to do with it.  (yes my basement needs so serious purging, maybe next year.)   I'm still trying to find all my things.... luckily it's just packaging material, boxes, bottles, jars, push up tubes and the like.


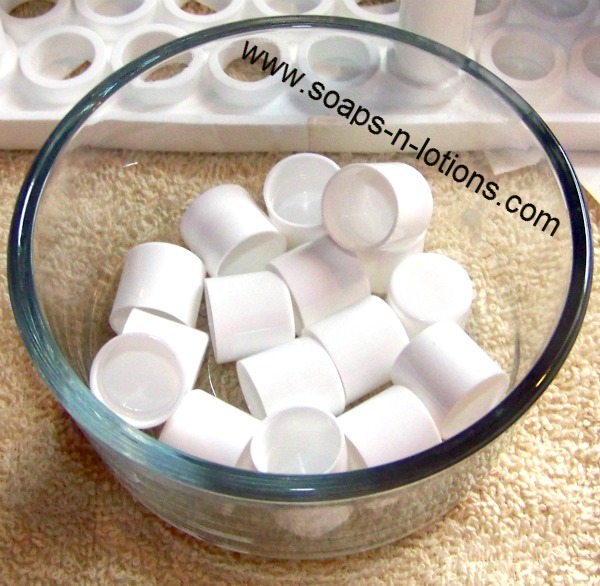
These are the boxes that I had bought.  In white.  But I do cover the hole and my labels go across the entire front and back!   They look very professional!

HELP !!!!!!!!!

There in't time to order new boxes, and I am not even sure where my shrink wrap bags are.  Of course I'm not overly fond of them in the first place so I doubt I would use them in I found them.  Unless the soap is well aged it will loosen inside the band and smears soap on the band making for a not so very professional looking bar of soap packaging.

I don't want to use cigar bands because unless your soaps are 8 weeks or more old they will loosen up and won't look very nice in weeks to come.  I need them to look great here and now as well as in the future.

So I had to think of plan D, E, F, G or even H...... I really wanted boxes because they just look so nice, but also my soaps are fresher so they still have moisture to evaporate out of them.   Because of that they will have a note about that on the top of the box.  But back to my bigger problem.

There I did it again, and said the word box, and I didn't have one.  But I really wanted one, so I thought back to a time before I started selling and did what any creative soapmaker would do and that's to make my own.

Of course it's time consuming to make them, but right now I have slave labor my daughter helping me out.   I found a template online and used that printed on card stock paper so it's much thicker than regular copy paper and will hold it's shape.


This is the template that I chose, but there are plenty on google images to select from.  I tried printing it right from the page didn't work very well.  It was too small.  So I uploaded the image to my labels program, flipped the image and after a few test prints for size I was able to get it just right.


Shown on my label program on a full sheet of paper.   I printed out a gazillion or so it feels now that it' the correct size.  My daughter is cutting the piece out, and on the fold lines is using a ruler and a pen to score the folding lines.  This makes folding them so much easier and more accurate.  Thank goodness for kids helping out.  Of course she will be paid for her troubles and saving me from trying to figure out additional plans!

Now I can do what I usually do and print out the product labels that will stick to the box so they will be ready to be sold.

This is what my finished box looks like.  .... quick cell phone picture.


But honestly, my soaps fit much better in these boxes because they are custom sized.   I may have to work the template to work with other sizes that I need....... Love the white......


Friday, August 15, 2014

Making The Secret Feather Swirl Cold Process Soap Tutorial.

I would like to let you know of a great turorial posted by one of our forum members and she has given me permission to post  it here on our froum blog.

jcandleattic : You can find her website here if you would like to purchase any of her items!
http://www.thecandleattic.com/
(link will open to a new page)


If you want to learn more about making soap, please feel free to join our forum
http://soapsnlotions.forumotion.net/


Friday, August 1, 2014

Tallow Beer Soap with Colloidal Oatmeal & Jojoba Beads

I saw this on pinteret some time ago and it was my inspiration.  However I didn't have wheat bran.  Is that the same thing as wheat germ?   Well I didn't have wheat germ either as I had thought but I must have tossed it when cleaning out the fridge one day.   Well I found that out after I had opened the beer and set it to boil to make some beer soap.  So I improvised........
http://www.greatcakessoapworks.com/handmade-soap-blog/index.php/how-to-make-beer-soap/


When working with beer, there are some very important things to know and remember.  First is that you need to cook the alcohol out or else your soap will seize.

The second thing is you can use beer as the only liquid in your soap or part of the liquid.   If you use it as the only liquid you will need to take some safety measures first.  Beer tends to volcano up out of the container used so I suggest you use a much larger container than you normally use to mix your lye solution in.  You must also make sure it's heat proof and can withstand the high temperature that takes place when the lye reacts with the beer.   Use a 2 quart pitcher or a gallon one depending on the size of your batch.  (you know the kind you make kool-aid in... rubbermaid etc)   Put the pitcher in your kitchen sink or another bowl just in case it does volcano over.  That way you don't end up with a mess you would rather not have to clean up.   Pour the lye into your beer very, very, very slowly.  I can't stress this enough.  It will smell terrible so I usually hold my breath while I stir sprinkling the lye in every so slowly.    Let it cool down and come down to room temperature before using.

But for this recipe I use water with my lye that I pre-mixed some time ago.   This way I don't have to wait for my lye solution to cool and using a little math I know how much additional liquid to add.   Using equal parts water and lye I pour that into a small pitcher and set it aside until I am ready for it.

Always use a lye calculator to figure out how much lye and total liquid for your recipe.

This particular batch that I made I used 400 grams of oils.
I used 26% Lye Solution but you can change that to your own preference.  I just personally like the additional liquids in my soap.
7% Superfat (lye discount)

The benchmarks came up on soapcalc as this.   This is a bit different than my normal soap as the cleansing number is higher than what I normally make for bath soap.  But I am using this in a soap scented with a mens fragrance and I wanted those extra cleansing points.
Hardness 40
Cleansing 21
Conditioning 55
Bubbly Lather 35
Creamy Lather 33

20% Tallow
15% Coconut Oil
15% Palm Kernel Oil
15% Castor Oil
13% Sunflower Oil
12% Avocado Oil
10% Olive Oil

Remember oils are not interchangeable for the most part but you can change a few.
* ~ If you don't have tallow you can use palm.  I would not suggest lard as it's just not has hard as the others, but that is my own personal preference.
** ~ If you have only have palm kernel oil or coconut oil you can use 30% of one or the other instead of both.
*** ~ The 15% of castor oil is critical as it boosts the lather, but also it is the balance of the whole recipe.  It doesn't make the soap sticky as some report if the recipe is balanced in the first place.
**** ~ The last three oils that total 35%.  Sunflower, avocado and olive oil but you can can sub whatever oils you happen to have or want to use.  But I would watch close on how much soybean (vegetable) oil and canola oil you use keeping them low percents to 8% or less of each one if you are wanting to use either of these.  The reason is because these oils are prone to DOS (dreaded orange spots) in soap and can go rancid in your soap after the soap is made.   But if you want to use a butter such a shea, cocoa or mango butter I would suggest between 5% and 10%.   But just so the total equal to 35% total.

Please run your recipe through your favorite lye calculator to get the amount of lye and liquid for the batch you are making.
http://www.soapcalc.net/calc/SoapCalcWP.asp
If you are going to tweak this recipe and use different oils from that I have given to use you can adjust the percents up and down until they are the same as what I have given or what you like.   Personally unless the soap contains a very high percent of olive oil (70% or more) I would not go lower than 40 for the hardness.  Otherwise it's like a kids teeter totter, one number goes up the same time the other number goes down.  So it's a matter of finding the balance of the entire recipe and knowing what benchmarks to look for.

I add all my "additives" as a % PPO.  This means Per Pound of Oil.  This makes is much easier to figure out how much should be used and you can make a small test batch and it's going to be the exact same recipe if you want to make it again but a larger batch.   To figure out how much to use PPO is quite simple.  For example this batch uses 400 grams of oils.   The recommended use of fragrance is 1 oz per pound of oils.  But this can be difficult to figure out if you are using an uneven number or you are figuring your recipe in grams.  So 6% PPO is roughly the same as 1 oz PPO but much easier to figure out.  Multiply 400 grams by 6% = 24 grams of fragrance!  How simple is that!

So for this recipe I used the following additives.
6% PPO ~ Fragrance
6% PPO ~ Vanilla Stabilizer (optional if the FO discolors)  I did not use this in this particular batch
3% PPO Sugar
1% PPO Salt
1.5% PPO Kaolin Clay or Talc (adds slickness to the soap)
.5% PPO Titanium Dioxide
3% PPO Sodium Lactate (liquid) mixed with my lye solution.
Raw Silk Fibers (dissolved in the lye solution)

The sugar is added as a lather booster, while the salt adds hardness.  Because I want to make sure these two dissolve I do add just a little bit of hot water to them.  You can heat water or use hot tap water.  We have a "water boiler" on the counter so I always have hot water ready at a moments notice for a cuppa cocoa or tea.  Or coffee as my hubby prefers his coffee made with a french press.

Kaolin clay or talc adds a silky feel to the soap.   I tend to add titanium dioxide to most of my soap recipes just to help lighten them up as some oils can make the soap look a bit more yellow.   Beer will also affect the color of the soap, but don't expect any beer scent to pull through to the finished bar of soap because it won't.


Now to figure out how much additional liquid that you need.  THESE NUMBERS I AM PULLING OUT OF THIN AIR AND DO NOT REPRESENT ANY AMOUNT THAT SHOULD BE ADDED INTO YOUR SOAP.  IT's JUST TO USE AS AN EXAMPLE.......

Say your recipe calls for 234 grams of a liquid
and you need 76 grams of lye

I use 76 grams of water mixed with 76 grams of sodium hydroxide (lye) set aside to cool.  If you are using master batched 50/50 lye solution you will want to use 152 grams.
Pre-measure both your water and the lye in their own individual contains before mixing together.
ALWAYS mix the lye into the water and not the other way around.  This is critical!

Now you need to do some simple math to figure out how much additional liquid is needed.  Or in the case of this soap, beer that has been boiled to remove the alcohol and cooled.
234 grams - the 76 grams already added with your lye to = 158 grams of additional liquid.


Because I wanted to go for the look of the soap in the photo in the link at the top and I didn't have any wheat germ, I added colloidal oatmeal instead.  This is ground oatmeal that has the consistency of flour. If you make your own use old fashioned oatmeal rather than instant oatmeal or baby oatmeal.  I know a lot of people use baby oatmeal but the problem with baby oatmeal or baby cereal is that it is highly processed and has a lot of the stuff you want removed and other thing added.

I used 3.5% PPO Colloidal Oatmeal
But after stirring that in I didn't think it would have the look of the soap in the picture in the link above, so I thought hard about what else I had that I could add into it and this is what I came up with.

Jojoba beads..... I have many colors to select from so I added 1.5% PPO of Black Jojoba Beads.
Jojoba beads are made from jojoba oil and is a natural product and not the same as the plastic beads that are being banned and outlawed in some states. They are very small, smaller than a grain of sand.

I added them in with the oils and I should have added them in at trace instead.  I haven't use them in soap before so it will be a new experience.  I think they may have melted just a tad because of the heat it generate when the lye solution is added.  But the effect I wanted with just a bit of color and I think it did provide that.

I did not gel this soap so the color stayed opaque and is fairly light colored even though it contains a generous amount of beer.

Soap Still In The Mold


I Will Update When I Pull The Soap Out Of The Mold


Well several hours after this soap was made, I did find that jar of wheat germ.  It was new, unopened in the cabinet!  *duh*   Oh well next batch I guess.


Sunday, July 6, 2014

How To Line (wooden or otherwise) Soap Molds With Freezer Paper PERFECTLY

I wrote this such a LONG time ago.  It was so long ago it was before I had even invested in wooden soap molds or silicone or even plastic ones for that matter.   But the process is still the same so I have decided not to redo the tutorial.

It even shows that us experienced folks were once beginners as well.


Because my method of making a soap mold liner is a little unusual I thought I would share it with ya'll. But it's also dead on accurate and works beautifully and perfectly. Without any creases or lines on the sides that you can get with guessing the lines on the freezer paper or using plastic.

With little investment in materials.
It doesn't matter if your mold is a plastic drawer organizer, or a cardboard box or a more expensive wooden mold. Perhaps you want to line something else as your mold. It's the general technique that is important.

To start with my mold is a super spendy one as you can see by my pictures. Something I am sure anyone reading this would have access to..... Even if it's not a recycled priority box, but you could use a milk carton, cereal box... anything you wanted to square or rectangle.


Ok I took a priority mail box that was 3" wide and 12" long and I cut it to be 3" high. And I got two molds from one box as well. How's that for being thrifty.


Then moving on to your investment. I am also a quilter and so I happen to have quilting tools on hand as well. So I took my quilting ruler that measures 6 1/2 inches wide and 24 inches long.


Here is a close up of the corner so you can see how it's marked.


This particular ruler cost just a hair under $10 but they do make smaller ones that are cheaper. I got mine in the craft department at wal-mart. My kids stepped on my other one, but that only measured about 13 inches long, and so i had it taped together. So I replaced it.  This was purchased some time ago so I am not sure what the current prices are.....


Now moving on to your freezer paper. You will want to draw an extra line to square up your raw edge. So use your lines on your ruler to do the work for you on this one and draw the first line to square up your corners.  This keeps the side of the paper square and even.


Next is trial and error for the most part. It may take you a few tries to get the exact measurments you need for your mold. But once you know this will make future liners easier to make. So measure your mold in length and width. And follow the directions to make a box as I show you. Slip it down into your mold. And make the next box larger or smaller based on how it fits.

For example I know that with my mold the width needs to be 1 marker smaller than 3" and the length needs to be 1 marker larger than 12". And for the hight of the sides to make it easier I also use the same width mark.


And draw your lines. Don't forget to include a mark for your corner fold marks. And fold on all the lines.


Now fold and tape your corners. Fold them to the outside, and I like to fold and tape them to the longest side.


Repeat on all 4 sides to get your box.


Now drop it down into your mold and you should have a perfect fit. Because this is paper I like to add a bit of tape to keep the paper stuck to the mold side so it doesn't fold in when i'm pouring in my soap.   I mostly use silicone molds now, but should I go back and use some of my wooden molds I think I am going to buy a roll of 1" wide grosgrain ribbon and cut two lengths, possibly three.  Put them under the paper and draping outside the mold.  I would still add a bit of tape to the corners so it doesn't fall in by accident when you are pouring....  Then when the soap has hardened you can grab the ends of the ribbon and pull the log of soap out more easily.  The ribbon is very cheap at walmart and I'm sure just as cheap at other craft stores.  I live in a small rural community and don't have access to other craft stores without ordering online or driving great distances.  (about 6 hours round trip)  So that is why I shop walmart, it's all I have......


And vola` one perfectly sized paper soap mold liner. Because cardboard tends to bow out when you add your soap I figured a way to help with this problem. If you go to the top of this tutorial and look at the first picture you will see a piece of clear tape across the center. This helps the box keep it's shape while the soap hardens.

Then when you want to remove the soap from the box just use a knife and slit through all the tape and set the box aside for the next time you want to soap. Rip the paper off your soap and you got one fantastic soap log.

And now write down the measurements you used for your soap liner so the next time you want to make soap it goes licky split to make up your liner.

Cleaning Soap ~ Stain Stick Soap ~ 100% Coconut Oil Soap


While I am not one to use homemade laundry soap there are plenty of other homemade cleaning recipes that I do use. This is one of them.

My husband’s work decided to change their uniform shirts. They are now required to wear high visibility vests and/or shirts instead of their usual darker colored shirts. First off the darker shirts were nice because they hid any stains! But now with bright lime green and blaze orange I have to deal with the stains more as they show up easily with the light color.

I tried several commercial made stain removers without great success. I also only use one of two laundry detergents as they are highest rated with the Consumer Reports Company. (a company I really believe in) So it’s only Tide or Whisk for my family. However I may purchase Gain if I have a coupon to be used on towels and bedding where I’m not dealing with tough to remove stains. But that’s another story…..

So I decided to make this stain stick but it also works great as a general cleaning bar of soap. It’s especially useful in getting dirt, grease, grime out of the grooves of your fingerprints on your fingers! You would be shocked and it’s perfect for those gardening and digging in the dirt.

It’s been amazing for the hubbies work uniform shirts. I do try to soak them in a bucket with oxiclean but for grease stains or other dirt stains I do give it a good scrub with a medium bristle brush with this coconut oil soap.

Now onto the soap…. Because this is used on laundry I didn’t want to scent this soap. Now another unique thing about this soap is it’s superfat.

The ingredients are simple,
* Water
* Sodium Hydroxide,
* Coconut Oil.


I prefer soapcalc as my lye calculator so feel free to enter your recipe in the lye calculator you are most comfortable with. You want 100% coconut oil so decide how big or small you want your batch to be. Because this soap is going to get hard I don’t want to have to cut it, so I prefer to use individual silicone molds. They come in many shapes and sizes. I like the round ones from WSP or BB, but you can use whatever you have. But I do recommend not having to cut these soaps or they may crumble just because they are so hard even using full water (liquid).

Now once you have entered the amount of coconut oil you want to use, you want to drop your superfat percent down to zero. You may be wondering why you want to do this when coconut oil is already cleansing and drying to the skin. The reason why is that I don’t want that small percent of oils that would be leftover with say the normal 5% superfat on the fabric of my clothes. So I want to use the correct amount of lye to zero out all the oil used to make this soap. If you are concerned about a lye heavy soap just use a few extra grams of oil when you are measuring it out, but it won’t be lye heavy with a 0 superfat.

Because this is a very cleansing soap I do like to use blue nitrile gloves when it use it. But you can use latex gloves, plastic food service type gloves or even reusable gloves like the ones Playtex makes often sold where dish soap is sold.  Whatever your preference is for gloves when you are cleaning.

Make your soap as usual. When I make this soap I don’t do a liquid (water) discount and use less water. It makes a hard bar and it just gets harder as the excess liquid evaporates out.

In this recipe I am not giving instructions on how to make cold process soap as I expect those that read this and want to make it already know how to make CP soap and make it safely handling the lye aka sodium hydroxide.  If you have never made soap before I suggest you begin with reading up on how to make soap safely first.

Thursday, January 31, 2013

Lip Balm - Master Batching Your Own Base


Yesterday I wrote my blog entry on how to make your own lip balm.   

But what happens if you want to make several flavors but want to save some time?   Or you want to make some now and some later?

The answer is to learn to master batch!

I had a customer wanted natural unflavored lip balm, but I wanted to make more and save time making other flavors as well to restock my stash.  Not to mention that I plan on making lip balms for my kids classmates for Valentine’s Day.  You know it’s made with beeswax, flavored with honey flavoring for some and other flavors for others…. “bee mine” the whole play on of words.  Ok I guess I’m one of the few who think its funny, but I thought it would be cute.   

I even came up with a unique label for the class ones that are not my regular business labels!    Just for valentines day for my children's classmates!  
 Okay back to the tutorial, I just wanted to share something personal.


Use the same technique as posted on yesterday’s post (link at the top of this post) on how to convert your recipe from percents into weights.    Also see yesterday’s post for a recipe as well.

Decide on how much "base" you would like to make.  Figure about 5 grams per tube to get you in the ballpark area.  

Figure your recipe for the size that is needed and include the weight of your flavoring.   Weigh out all your ingredients omitting any flavoring and/or sweetener.   Doing it this way will still allow you to be correct for your ingredient label and having everything in the correct order.  I took the time to weigh out 200 grams which will fill about 40 tubes when it’s all said and done, minus any amount that you can’t get out of the container because it has hardened and stuck.  

Then when you want to make up a smaller batch, simply figure your smaller recipe out and add up all the butters oils and waxes portion of the recipe as a total and use that amount for the amount of your master batch that you weigh out as one single weight.  Then weigh your flavoring and sweetener just before you make it. 

This technique will save you a lot of time down the road when you want to make more.   It's also nice so you don't have to weigh such small amounts for various oils/butters.   Melt your oils and butters.  You do not need to melt them until everything is completely melted.  Continue until most everything has melted and then stir using it's own residual heat to melt the rest.

I highly recommend using silicone for this next step.  But make sure it’s a silicone mold that has never come in contact with fragrance oil, so this can be one that doubles for cooking as well as crafting as long as you use it for things that will be considered edible which lip balm is.  If you also use it for food, make sure it has been thoroughly washed in hot soapy water and is dry.  You don't want any wet areas (water) to come in contact with your lip balm while your making it. 

Here are two examples of ones I used.   This isn't all the master batch that I made, but just some of it.   The red one is a silicone ice tray that makes heart ice cubes the blue one is a muffin tray.  This muffin tray is different from the others I use for my soaps so it makes it easy to tell it apart.  The ones that I use for soap with fragrance oils are baby blue or purple in color and is shape of the entire mold is  slightly different.  Thanks to my SIL for giving me the blue muffin mold for Christmas!    The heart one is one that I purchased from Target during Valentine’s Day in their holiday section and it was cheap.   


Pour your melted lip balm into the mold and let it harden.   Remove from the mold once they harden and you can store them in another container of choice or even a zip style bag.  Just be sure to clearly label your container so you know what is inside when you want to use it later. 


The next time you want to make lip balm use enough of the base that you made for that portion of your recipe.   Cutting the larger pieces into smaller ones as needed until you get the exact weight needed.  But you don't need to cut up larger pieces just to break them down.   They will all melt just the same.   Just like before use that residual heat to melt the rest until it's returned to it's liquid state. 
  
Add your flavoring and sweetener if you decide to use it and pour into the mold of choice with the method that you prefer. 

For example :  This would be my Master Batch Recipe Sheet
For A Total of 500 grams
29% Beeswax ~ 145 g
29% Cocoa Butter ~ 145 g
10% Coconut Oil ~ 50 g
10% Shea Butter ~ 50 g
9% Sweet Almond Oil ~ 45 g
10% Avocado Oil ~ 50 g
3% Flavoring ~ (15 grams set aside for this but don't add it) 

To make my smaller batch this is what my recipe sheet would look like.
29% Beeswax ~ 14.5 g
29% Cocoa Butter ~ 14.5 g
10% Coconut Oil ~ 5 g
10% Shea Butter ~ 5 g
9% Sweet Almond Oil ~ 4.5 g
10% Avocado Oil ~ 5 g
3% Flavor Oil ~ 1.5 g
(not added as a percent equal amount of sweetener.)
I use Lip Smacking Sweetener sold by Elements Bath and Body

So I add up my oils, waxes and butters which comes to 48.5 grams so you can choose to round up or down it's up to you.   And weigh that amount of your pre-made master batch mix.  

Then using a smaller scale that weighs out 0.01 grams I suggest a reloading or a jewelers scale.  See yesterdays post for the reasons why and suggestions on how to do it.   Weigh out the flavoring and any sweetener you may choose to add to your recipe.   

Stir and pour as usual. 

I know a lot of people think adding sweetener to lip balm will only make you lick your lips more and add to the problem.  But I do not find that at all the case when using the Lip Smacking Sweetener sold by Elements.  It gives the lip balm another dimension that is hard to describe, but it makes using lip balm a joy! 


It really is that simple, and this technique can save you a lot of time when you want to make more or make multiple batches in different flavors.   I don't sell a lot of lip balm but I do offer it to customers as well as my own personal use for myself and my family.  So I don't want to make up 50 tubes of each flavor.  Instead I make 12 at a time and offer several flavors to pick from.  Just like fragrance oils, that way I have something that will fit everyone. 


Here are two cleaning tips!
When cleaning your lip balm filling tray a paper towel to wipe it down and use q-tips to get inside the holes works like a dream!  When cleaning your container that you melt your lip balm in cleans up much easier if it's warm before you wipe it out with a paper towel.  If needed reheat in the microwave to melt and soften any remaining wax before washing with hot water and dish soap.


If you are going to sell your lip balm you do need to know that you are required by law to have it labeled according to FDA regulations.  Take the time to read up the regulations that the FDA has put into place for the labeling of cosmetics.  Lip balm is considered a cosmetic by definition.  Even if you plan on giving them as a gift or for personal use I highly suggest having them properly labeled. 

Wednesday, January 30, 2013

Learn To Make Lip Balm

Making lip balm is one thing that is actually very simple to do so I hope you enjoy this tutorial that I have prepared for you so you can learn as well.


I'm one of those that really likes their lip balms.  I've purchased many brands in the stores and I can honestly say that I haven't found many that I like.   The only ones that I like are the ones that are made with more natural ingredients such as beeswax and cocoa butter among other various oils.  It's the texture and consistency as well as how it feels on the lips that I am fussy about.   

First off lets start with a basic recipe.   This is one that I have found to like, but enter in your own specific oils depending on what you have or what you want to use based on research you have done for each of the oils.  Any ingredient that you use make sure it is safe to use in lip balm.

The two necessary ingredients are beeswax and cocoa butter, the rest of it can be interchanged to some degree.  However I would suggest not using so many different oils that your trying to weigh out very small weights.

To convert your recipe from percents to actual weights you can use this calculator.
http://www.wholesalesuppliesplus.com/Calculators/Batch_Size_Calculator.aspx

29% Beeswax
29% Cocoa Butter
20% Solid Oil or Butter of Choice
19% Liquid Oil of Choice
3% Flavoring Oil or Edible Essential Oil

The total above is 100% but if you want to use a sweetener I highly recommend this particular one from Elements Bath and Body. I've been using this one for several years.  Use it at the same rate as your flavoring oil, and yes I know your total will be 103% on paper, but it does work very well.
http://www.elementsbathandbody.com/Lip-Smacking-Sweetener-Oil-pr-839.html

There are many companies that sell flavoring oil to scent lip balm.  Please do not use a regular fragrance oil because they are not safe to put into lip balms as they are not what is considered edible.   Some essential oils can also be used in lip balms, but please read the description from the seller because if it's safe to use in lip balm it will state so.  Some essential oils are not safe for this application.

I have been making lip balm for quite some time, and I have found that one tool that is almost essential is a lip balm filling tray.   I have been making them without it for some time and never again!


I purchased mine from The Sage but there are other companies that sell them as well.
https://www.thesage.com/catalog/products/Lip-Balm-Filling-Tray.html
They come in different styles, shapes and sizes, so get the right one for the tubes that you have purchased.

But fear not you do NOT have to fill 50 tubes at the same time to use it effectively and I will show you how.

Convert your recipe to actual weights and I suggest writing it out or printing it out on a recipe sheet.
An example of what I do can be found on this link, which is actually for soap recipes but it can be modified for this application as well. 
http://soapsnlotions2010.blogspot.com/2013/01/date-your-soaps-recipe-sheets.html
 
If you want to fill 12 tubes instead of 50 I set my recipe for 50 grams for my recipe.

To prepare your try you want to use a roll of electrical tape to cover off the parts that you don't want to fill.  The reason why I use electrical tape is that it peels off easily without leaving a sticky residue and seals off the area needed.


As you can see in the above photo I have taped off three different areas.  

Section #1 are the 12 holes for my tubes that I plan on filling with my recipe.

Section #1 is the one extra hole that I have ready in case I need it.  If there is a little left over lip balm I put it into that tube rather than waste it.   I do not label that tube as of yet.   But later once it's been filled I use my regular label, but give it the name of  Mystery Flavors as there are several flavors poured into this tube which will eventually go to one of my kids to use or I will use it myself.   As the tube is used you get to experience different flavors. Which can be kind of fun as well.  But I feel it's better than wasting it.

Section #3 is the area of the tray that is not needed at this time.  I did place an X in the electrical tape just for this tutorial.   You don't need to waste your electrical tape when making your own lip balm.

I like to label my lip balms first, but you don't need to do that.  I like to do it first so when I'm done, the lip balms are done.


Take the caps off your lip balm tubes and place them into the tray.   As you can see the 12 tubes that I plan on filling as well as the one lone tube that I plan on filling with any excess balm.  The three tubes that are seen off to the left are put there so when the tray is turned up side right it can balance correctly and won't topple to the side.


Don't forget to place your caps into a bowl or other container so you don't lose them and will have them later when you need them!


Weigh out your ingredients carefully on a digital scale.  Leave out the flavor oil and sweetener until after you melt the oils and wax.   I prefer to weigh in grams because I feel it's more accurate.  There are 28 grams to the ounce.

I like to use a pyrex 1 cup measuring cup because it's the right size and has a handle and a pour spout.  


I like a use a really small spatula that I purchased I think in Wal-Mart, although I do have another that is similar but a more traditional shape that I found in my local hardware store that works very well.   Only use a spatula for this application that is used just for this purpose or other food items.  You don't want to use one that has been in contact with fragrance oil that is not edible.  


I like to melt my beeswax and other oils in the microwave, but it can be done over a double boiler as well.   Heat in short bursts and when it gets hot, stir the mixture.  You don't want to melt the entire mixture until it's all melted as there is residual heat that can be used to melt the last of the ingredients.  So stir well. 

Once the oils and butters have melted and have cooled a tad, but not started to harden up add your flavor oil and sweetener if you want to use it.   Because these amounts are small I highly recommend using a another type of scale that is made just for weighing small amounts.  You want a scale that weighs 0.01 grams.  I happen to use a reloading scale, but if you use that type of scale make sure you set it to grams and not grains!   A jewelers scale can also be used.

This is the scale that I happen to use but it's not a cheap one.  They can be purchased for about $20 and is a wonderful investment.   I removed the tray on top that someone who was reloading would use and in it's place I use a white disposable SOLO cup.    It's a 3 ounce cup and are inexpensive at walmart.   I also found these cups can be used with fragrance oils, flavor oils and essential oils for a short period of time.  I pour into the cup just before I need the oil then throw the cup away right away.  If you leave it in the cup too long it will melt the cup and make a mess.   But unlike some cups that won't tolerate these ingredients for even a short time these will and are inexpensive. 


Once your oils and wax have melted weigh out your flavor oil and sweetener and add it to your mixture and stir.

To measure out your flavor oil or essential oil I highly suggest the use of a pipette.   I do wash and reuse them, but make sure you keep your pipette's separate from the ones you use for your regular fragrance oils.  Let them air dry between uses and before using them again.  I wash them right after using them in water with a drop of dish soap.  Rinsed multiple times with clean clear water.


Pour your lip balm over the top of your prepared surface.  Don't worry about any over spill.   After it has cooled scrape the excess off with a knife or your spatula.  Reheat and pour if necessary.


Fill that one extra tube as needed.  When it's full replace with another tube.   This way you can use every last drop rather than waste any of it.   How cool is that!

Let them fully cool........


Remove the tubes from the tray and replace their caps that you set aside.   Let them sit for a few hours before using to allow them to fully harden.  While you can use them right away they will be better if you let them fully harden.  You can cut off that bit of extra at the top if you want, or you can leave it in place so the user won't have to turn it up to use.


Here are two cleaning tips!
When cleaning your lip balm filling tray a paper towel to wipe it down and use q-tips to get inside the holes works like a dream!  When cleaning your container that you melt your lip balm in cleans up much easier if it's warm before you wipe it out with a paper towel.  If needed reheat in the microwave to melt and soften any remaining wax before washing with hot water and dish soap.


If you are going to sell your lip balm you do need to know that you are required by law to have it labeled according to FDA regulations.  Take the time to read up the regulations that the FDA has put into place for the labeling of cosmetics.  Lip balm is considered a cosmetic by definition.  Even if you plan on giving them as a gift or for personal use I highly suggest having them properly labeled. 


Stay tuned for my next topic on how to save time when making multiple batches of lip balms in different flavors!


Thursday, January 10, 2013

Date Your Soaps & Recipe Sheets

This was something that I started doing when I made my very first batch of soap. But I soon learned there was a flaw in my method of dating my soaps.

Dating your soaps is very important so you know when it was made, and will know it’s age and about when would be the best time to begin using that soap. Any cold process soap and each variation of it as well as hot process soap really does need about 3-6 weeks to sit on a shelf to what is known as cure. But even though the soap can be used within days it does get much better and less harsh as it ages.

But it’s more than that. What I failed to do with my first number of batches was to date each batch with the year it was made! You may wonder why the year can be so important. It’s because if you want to go back and look at a particular batch you know not just the month and day it was made but the year as well. This can be important if looking at a soap that might be 2 or 3 year old! As we ring in the New Year I thought it would be a good time to mention this important step.

One other very important step that I do feel that is almost critical is to give each batch that you make it’s own batch number as well as it’s own recipe sheet. This sheet has evolved a lot since my first one, as I decided what info I wanted there and what order to put it in.

Then this is printed off on card stock paper because it’s more sturdy than regular copy paper and I use a three ring hole punch to put it into a binder for future reference. Any notes can be hand written on the sheet that you feel you may need later. I’m on my 4th binder now! And there are times when I do go back to my first and second binder to look something up!

This is what I happen to do myself and how I set it up now. I use the “tables” option to set the lines up to make it look neater and more professional. You can adjust the size and width of the lines as well. This works with both Microsoft Office and OpenOffice.org. I took two screen shots to show the top portion of the paper and the bottom portion.

click on photo to enlarge


You will notice there isn’t a spot for the batch number. I just hand write that in on the top right corner of the page. Under the scent I also hand write the mold that was used as well as the number of bars that it made. That way I can go back to get that info later if it’s needed.

I also give each and every recipe I formulate a number. That way I can go back and look at the recipe as a whole as well if I need to.

You will notice on the top right portion I write the number of grams of oil used for the recipe, and the lye solution strength on soapmaker 3, on soapcalc you can enter the water as % of oils or use the lye concentration percent. This number has to do with the amount of water that is added to your recipe. If you want to use more or less water depending on your recipe and what your comfortable with. Below that I write the lye discount or superfat. I personally prefer to soap at 7-9 percent rather than the typical 5%. Then again this also depends on the recipe and the oils used. Some oils go rancid faster than others and if your superfat is too high you can set yourself up for DOS. (dreaded orange spots)

Below that stretching across the page I add a table to write down the hardness, cleansing, conditioning, bubbly lather and creamy lather benchmarks that are found on soapcalc. This helps me to get a feel for the soap before it’s even made, but also to compare recipes at a glance after they are made by the feel of them.

Next you can see I leave a space for each ingredient. I type in the percent of each oil used, the oil actually used and the number of grams needed. I don’t type anything in the last column. Instead the numbers are hand written in here when the recipe is made up. That way if the recipe calls for 149 grams of coconut oil, I can add the number that was actually put in. Sometimes we over pour slightly one oil and may compensate by under pouring another.

click photo to enlarge

Now for the bottom half of the page.........

Shown in the purple font I write the amount of liquid the recipe calls for as well as the weight of the lye required.

I prefer to use the 50/50 solution as it saves me time when I make soap, but if you do not use that method then just add in the amount of liquid used and the lye amount. Still keep that bit above in the purple because you will often find you will like to split your liquid rates up. I suggest mixing water with your lye. Use the same amount of water or a little more than the amount of lye required. Then as you see below I had additional water added.

Because I want a one stop page for all recipes I do figure the batch for the grams needed as if the batch did require a vanilla stabilizer added. But if it’s not needed it’s crossed out and the math is already done as you see the number in brackets to the side. I also add sodium lactate to every batch and you do want to consider this number as part of your liquid used. So the match numbers of the sodium lactate, additional water, vanilla stabilizer and the amount of water that was used and was mixed with the lye must equal the number of total liquid used that is between the grids. I hope I wrote that out to be clear enough to understand.

You will notice that I have three amounts listed for the powdered milks that I use. If you change the size of your batch then these numbers will need to be updated. I do that so I can make any of the three with this recipe and have one sheet with the math already done. I cross out the two not used and write in the number I need to use and also how much was actually used. The advantage of using powdered milks is that you can have the total amount of the liquid figured as powdered milk and still use water to mix with your lye. So the amount of powdered milk used is based on the number of the total liquid amount used in the purple as shown.

At the very bottom of the recipe sheet I have the usage rate for each milk written down.

I also like to add other additives into each soap batch. For the most part these don’t change but if they do I would just cross them out or hand written them in at the bottom of the page. Note I don’t have any colorants written down as part of the recipe. This can change batch to batch so I just hand write them in on the bottom of the page as well.

Because I like things to be as accurate as possible for the additives I like to figure them in terms of PPO. Per Pound of Oil. That way I can make a small test batch and if I like it I can go back and figure a larger batch and the additives will always be the same regardless of the mold used. After all we don’t always use even number of pounds for the oils for every recipe and batch or mold! So to figure these numbers for example for my test batch of 300 grams of oil and I want to add 4% PPO of sugar I multiple 300 times 4% to get the number of 12 grams of sugar to add. With the exception of eggs, they make soap more moisturizing so I do figure that up to 1 egg per 300 grams of oil give or take depending on the size of the batch. I don’t use partial eggs in a recipe.


On the back of the recipe sheet I place a sticky label that I printed out.  On that 3x4 inch sticky label I type out the ingredient list in proper order using the tables.  This make it easier to go back when I need that info to copy it down onto my soap label. Because I don't make any claims about my soap other than it's soap and that makes it so it can be labeled as a soap rather than a cosmetic I don't go into detail about the soap colorant added other than the name of the soap colorant.   If you make claims about your soap that it will need to be labeled as a cosmetic.  But most of all don't make any medical claims about your soap because that makes it an over the counter drug and you don't want to go there with the FDA. 

Friday, January 4, 2013

Solid Lotion Bars Recipe

Solid lotion bars is a nice alternative for those who don't want to buy or use preservatives in a liquid lotion. 

But remember that that they are mostly oils so not only does a little go a long ways but some people may still find them too oily for their skin.


This is a recipe that I created for the members of Soaps-N-Lotions.

  1. ~ 31% Beeswax
  2. ~ 31.5% Cocoa Butter
  3. ~ 14.5% Fractionated Coconut Oil
  4. ~ 9% Sweet Almond Oil
  5. ~ 8% Jojoba
  6. ~ 1% Tocopherols, Vitamin E
  7. ~ 5% Fragrance Oil or Essential Oil

You can make a small batch or a large batch.
If you need a calculator to do the math for you this is a good one to use.  Simply type in the ingredients and the percent of each to use and calculate it into weights.
 http://www.wholesalesuppliesplus.com/Calculators/Batch_Size_Calculator.aspx

Select the mold or container that you will be pouring into.   Hard plastic molds that are cute shapes make really cute lotion bars.  Just remember that you really need to put that bar into a solid container for storage.   Twist up tubes also work really good for these lotion bars as well. 


It's Almost All Melted.........

Decide if you want to melt your ingredients using the microwave or the double boiler method. I put mine in a 4 cup glass measuring cup and heated it in the microwave.  Once you decide this select the container that you will be using and weigh out the first 5 ingredients that you will be using.  You don't want them overly hot, but if it's not hot enough it will cool off and harden.  It's really not that hard, and easy to know the difference.


 It's not fully hardened, you can see the color difference.

Once everything has melted and it's not too hot or too cold add your tocopherols and your the scent of your choice.  If you don't want it scented just replace that percent with a liquid oil of choice.  One that is already in the recipe or a different one.    Pour your mixture into your mold and let it set until it hardens.  Once it's hard pop out of the mold and it's ready to use.   If you made it in a mold have a container ready to store your lotion bar.  That keeps it clean and ready to use, but also makes it handy to take with you.


The Finished Lotion Bars!!! 


Any liquid oil can really be used for lotion bars.  Just change out for what you want to use or what you have on hand.  But keep in mind that some oils do feel oilier than others on the skin which is why I selected the oils that I did for this recipe.   It will still feel oils because after all they are oils, but just not as oily as other can feel.

Happy Crafting !!!!
Krissy